Last updated
Requiring approval for new listings
A guide that shows how the process for approving listings as operator works.
Table of Contents
Sharetribe offers you the chance to approve new listings before they go live. This article explains how to use this feature through the Console.
Understanding the listing approval function
Normally, a new listing on Sharetribe goes live as soon as the person who created it hits the "publish" button. However, you can change this so that new listings need your approval before they go live. This means that a listing only gets published after you've checked and approved it.
You might want to use this feature to make sure the listings are right for your marketplace and fit its theme and the terms of use. For example, if you've limited the number of listings a seller can post, you can use this feature to keep an eye on the numbers.
Note that this only applies to new listings. If a seller edits a listing that's already been approved, they won't need your approval again. Keep this in mind if you want to review all changes to listings.
Currently, you can't "decline" a listing, though you can delete a listing that you don't approve if you prefer. If a listing needs changes to meet your marketplace standards, you'll need to get in touch with the seller to suggest improvements and ask them to submit a new listing.
How to manage listing approval in Console
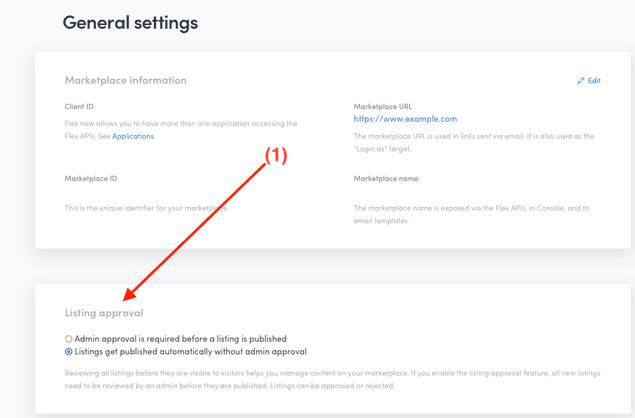
You can turn on the listing approval feature in your Console. Go to "General" and look down to find the right section (1). By default, listing approval is turned off.
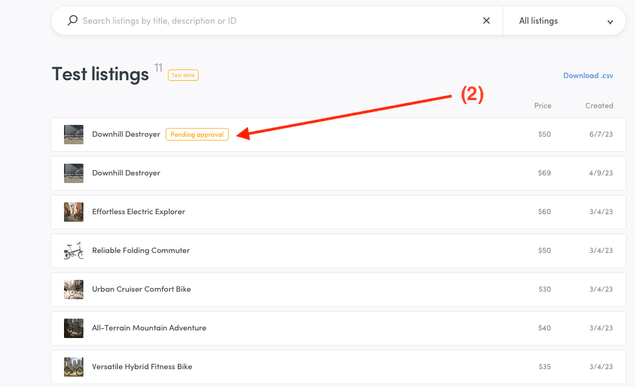
When you have listings that need approval, you can see them in the "Listings" view of your Console. Listings that need approval will have a special badge to indicate their status (2).
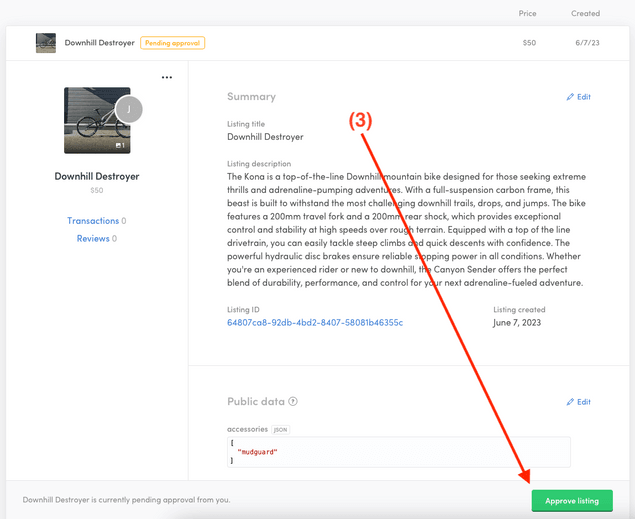
To approve a listing, click on it to open it. There'll be a button at the bottom of the listing panel that lets you approve the listing (3).
Experience from the seller's perspective
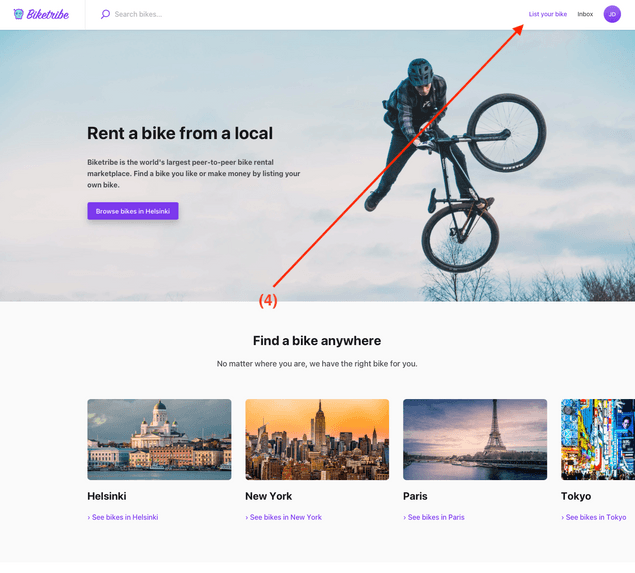
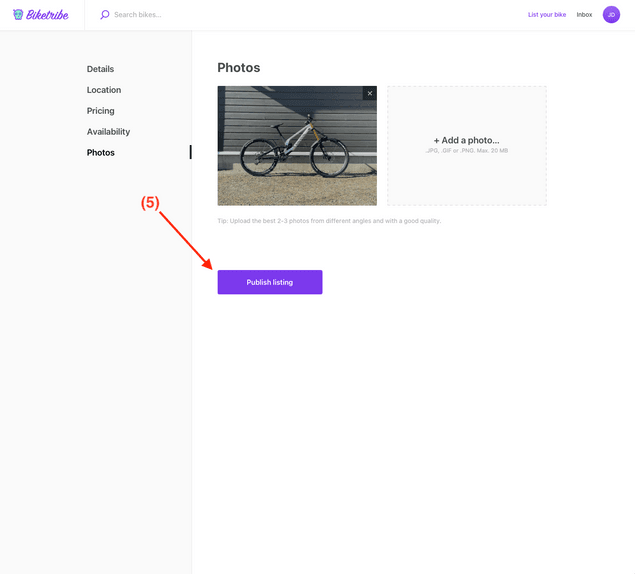
As a seller, you can create your listing just as you normally would, starting from the listing creation button in the top bar of the marketplace (4). The difference comes after you fill out all the fields and hit "Publish listing" (5). Instead of going live immediately, your listing will wait for the marketplace operator (the admin) to review and approve it.
While waiting for approval, your listing isn't visible to other users on the marketplace. This means they won't be able to see or interact with your listing until it's been approved.
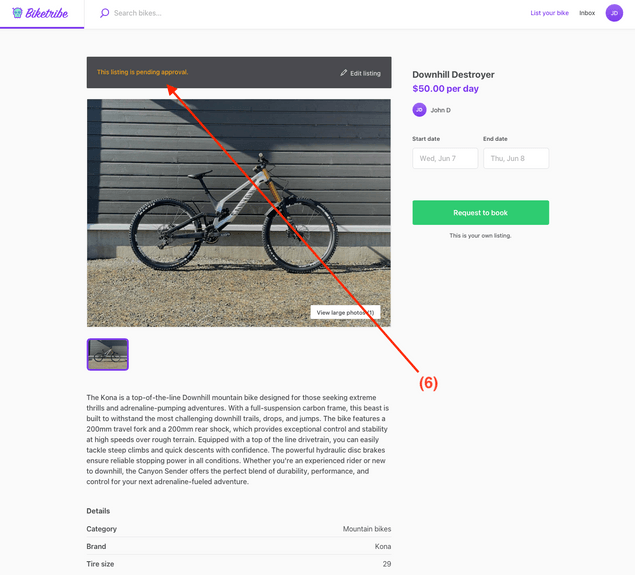
A noticeable feature will be a banner at the top of your listing page (6). This banner signals that your listing is "pending approval." This message is a reminder for you, and is not visible to other users. It simply means that your listing is in the process of being reviewed by the admin.
Once the operator has reviewed and approved your listing, it will become visible to all users on the marketplace, and they can start interacting with it. Remember, there's no automatic notification for this, so you might want to keep an eye on your listing's status.
